While the bacon craze seems to have cooled somewhat in recent years, bacon remains one of America’s favorite smoked meats, with an ever-increasing range of products from basic to artisinal, and in a variety of slice thicknesses and smoke flavors. While there are many delicious options available in stores and by mail order, there are some people who want to try making bacon for themselves.
In June 2011, a member of The Virtual Weber Bulletin Board named Bob Correll posted a message titled Bacon Made Easy. In it, Bob described the simple process he uses to make his own bacon. At the time, Bob said, “My hopes are to get more folks making their own bacon, and thought some recipes sound daunting, with all the precise measurements and additional ingredients.”
Well, Bob’s post really took off! At the time of this writing in August 2016, there have been over 400 replies to Bob’s original post and it’s been viewed over 98,000 views.
I’m not knocking any posts/recipes on bacon making, but if you want to try your hand at curing/smoking bacon, here is an easy way to start.
Add 1 Tablespoon of TQ for each pound of meat. Rub it on the meat. Add brown sugar and/or spices, if you like. Place it in a plastic bag. Put it in the fridge for 7 days, turning each day.
Day 7, rinse very well in cool water, pat dry, put on a wire cooling rack, place in the fridge for a day, or at least several hours.
Edit to add: After removing from the smoker or grill, bag it air tight and place in ice water to rapidly cool.
I asked Bob to take some photos the next time he made bacon using pork belly in his Weber Smokey Mountain Cooker, and he did just that in May 2016. Here are those photos along with a more detailed description of the meat selection, curing and cold-smoking process.
You may notice some minor variations between what Bob wrote in his June 2011 post and how he actually did it in May 2016 (for example, air-drying time in the refrigerator and final internal meat temperature), but those differences aren’t important. The method works fine either way.
Note: It was recently brought to my attention that the Morton salt website says the following about Tender Quick:
“We cannot recommend Morton Tender Quick for use with pork belly or bacon. Due to the differing fat content of individual cuts, the curing time for these items may vary significantly. For this reason, we cannot recommend the appropriate amount of Tender Quick or curing time in this application.”
Keep in mind that many people have used this recipe with great success to make bacon, and there are countless recipes on the Internet using Morton Tender Quick to make bacon with pork belly. Readers should decide for themselves how to proceed.
Hey there bacon lovers! If you ain’t never thought about makin’ your own bacon straight from pork belly lemme tell ya, you’re missin’ out on a game-changer. There’s somethin’ downright magical about that sizzle, the smell waftin’ through your house, and knowin’ you crafted every crispy strip with your own two hands. At our lil’ kitchen setup, we’re all about gettin’ down and dirty with DIY grub, and today, I’m spillin’ the beans on how to turn raw pork belly into the best dang bacon you ever tasted. No fancy chef skills needed—just some patience and a hunger for somethin’ epic.
Let’s get real store-bought bacon is fine but when you make it yourself you’re the boss of the flavor. Wanna go sweet with a maple vibe? Spicy with some chili kick? Or classic smoky goodness? It’s all in your control. Plus, you dodge them weird preservatives and junk they sneak into the packaged stuff. I’m gonna walk ya through every step, from pickin’ the right pork belly to slicin’ it up for the fryin’ pan. Stick with me, and you’ll be flexin’ your bacon-makin’ muscles in no time.
Why Make Bacon at Home? It’s a Whole Vibe!
Before we dive into the how, let’s chat why. Homemade bacon ain’t just food—it’s a flex. Here’s the deal:
- Flavor on Fleek: You decide how salty, sweet, or smoky it gets. Ain’t no better way to customize your breakfast.
- No Sketchy Stuff: Skip the nitrates and weird chemicals. You know exactly what’s goin’ in there.
- Braggin’ Rights: Tell your buddies you made bacon from scratch, and watch their jaws drop. It’s a convo starter, trust me.
- Saves Some Dough: Pork belly can be cheaper per pound than fancy bacon, especially if you grab it bulk.
I remember the first time I tried this—messed it up royally by skimpin’ on cure time, and it was saltier than the ocean. But man, even that flop tasted better than store junk. Lesson learned, and now I’m passin’ the wisdom to y’all.
What Ya Need to Get Started
Alright, let’s gear up. Makin’ bacon from pork belly don’t need a ton of fancy tools, but ya gotta have the basics Here’s your checklist
- Pork Belly: Get a nice slab, about 3-5 pounds works great for starters. Skin-on or off, your call (I keep skin on for extra cracklin’ vibes).
- Curing Salt (Pink Salt): This ain’t regular salt—it’s got sodium nitrite to keep things safe and give that bacon-y color. Don’t skip this!
- Kosher Salt: For that base cure.
- Brown Sugar: Adds a sweet touch to balance the salt.
- Spices: Black pepper, garlic powder, maybe some paprika or cayenne if you’re feelin’ wild.
- Big Ziploc Bag or Container: To cure the meat in.
- Fridge Space: It’s gonna sit there for a week, so clear a spot.
- Smoker (Optional): If you want that deep smoky flavor. No smoker? Oven works too.
- Sharp Knife or Slicer: For cuttin’ it into strips after curin’.
- Wire Rack and Tray: For dryin’ or smokin’.
Here’s a quick table for a basic curing mix for a 5-pound pork belly. Adjust if yours is smaller or bigger:
| Ingredient | Amount | Notes |
|---|---|---|
| Curing Salt (Pink Salt) | 1 teaspoon | Critical for safety, don’t overuse! |
| Kosher Salt | 1/2 cup | Base for the cure. |
| Brown Sugar | 1/2 cup | Sweetness to balance. |
| Black Pepper | 2 tablespoons | Freshly ground is best. |
| Garlic Powder | 1 tablespoon | For that savory punch. |
Mix this up in a bowl, and you’re ready to roll. Pro tip: write down your mix if you tweak it, so you can recreate the magic later.
Step 1: Prep That Pork Belly
First things first, grab your pork belly and give it a once-over. Trim off any funky bits or excess fat if it looks uneven, but don’t go crazy—fat is flavor, fam. Pat it dry with paper towels; wet meat don’t take the cure as good. If the skin’s on, you can score it lightly with a sharp knife to help the cure sink in, but that’s optional.
Lay it out on a clean surface, and let’s get to curin’. Take your curing mix and rub it all over—top, bottom, sides, every nook and cranny. Don’t be shy; massage it in like you mean it. This salt and sugar combo is gonna pull out moisture and preserve the meat while infusin’ all that tasty goodness.
Step 2: Cure It Real Good
Now, slide that seasoned pork belly into a big Ziploc bag or a non-reactive container. Seal it tight—don’t want no leaks messin’ up your fridge. Pop it in there on a tray (just in case it drips), and let it chill at about 35-40°F. Here’s the kicker: it needs to cure for 7-10 days. Yeah, I know, waitin’ sucks, but trust me, it’s worth it.
Flip that bad boy over every day or two to make sure the cure gets even. You’ll see some liquid poolin’ in the bag—that’s normal, it’s just moisture gettin’ drawn out. If it looks dry, you can add a lil’ more cure mix, but don’t overdo it.
Safety note: always use curing salt properly. Too much pink salt can be toxic, so stick to the recipe. If you’re unsure, less is more, and keep it outta reach of kiddos.
Step 3: Rinse and Dry
After a week or so, your pork belly should feel firmer. That’s a good sign! Pull it outta the bag and rinse off all the cure mix under cold water. Get every bit off—you don’t wanna eat a salt bomb. Pat it super dry with paper towels again. At this point, it ain’t bacon yet, but we’re close.
Wrap it loosely in cheesecloth or just leave it uncovered on a wire rack in the fridge for another 12-24 hours. This dries the surface and gets it ready for the next step. I’ve skipped this once in a rush, and my bacon didn’t smoke right—learn from my dumb mistake.
Step 4: Smoke It or Fake It
Here’s where you decide: smoky or not? If you got a smoker, hell yeah, let’s do this. Set it up for cold smoking if possible (around 80-100°F) or hot smoking (up to 200°F) if that’s your rig. Use wood chips like hickory or applewood for classic bacon vibes. Smoke it for 3-4 hours, or till it hits an internal temp of 150°F if hot smokin’. Keep an eye on it; don’t let it cook through yet.
No smoker? No biggie. You can “fake” it in the oven. Set it to 200°F, put the pork belly on a wire rack over a tray, and let it go for about 2-3 hours till it’s got a nice color and hits 150°F inside. Toss in a tiny bit of liquid smoke in a pan nearby if you wanna cheat the flavor (I won’t judge).
Step 5: Cool and Slice
Once it’s smoked or baked, let it cool down completely. Hot meat don’t slice well—it’ll tear. Stick it in the fridge for a few hours or overnight if you can wait. When it’s cold, grab a sharp knife or, if you’re fancy, a meat slicer. Cut it into strips as thick or thin as you like. I go for medium—too thin burns quick, too thick takes forever to crisp.
If you left the skin on, you might need to trim it off now, or just cook it with skin for extra texture. Up to you, chief.
Step 6: Store It Right
You ain’t gonna eat all that bacon in one go (or maybe you will, no shame). Wrap the slices in butcher paper or plastic wrap in small batches, then toss ‘em in the fridge for up to a week. Wanna keep it longer? Freeze it—lay the strips flat on a tray first so they don’t stick together, then bag ‘em up. It’ll last months that way.
Cookin’ Your Masterpiece
Now for the fun part—fryin’ it up! Heat a skillet over medium, no oil needed ‘cause that fat renders out. Lay the strips down, don’t crowd ‘em, and flip when they’re gettin’ golden. I like mine crispy but not charred—takes about 3-5 minutes per side dependin’ on thickness. Drain on paper towels, and boom, you’re in bacon heaven.
Wanna mix it up? Here’s some ideas:
- Breakfast Classic: Serve with eggs and toast. Duh.
- Bacon Candy: Brush with maple syrup while cookin’ for a sweet twist.
- BLT Upgrade: Stack it on a sandwich with fresh lettuce and tomato.
- Bacon Bits: Crumble over salads or baked taters.
Troubleshootin’ Common Hiccups
Things might not go perfect first try, and that’s cool. Here’s fixes for stuff I’ve run into:
- Too Salty: Soak the rinsed bacon in cold water for an hour before dryin’. Helps pull out extra salt.
- Not Enough Flavor: Next batch, up the spices or cure time. Experiment, yo.
- Rubbery Texture: Didn’t cure or dry long enough. Give it more time in the fridge steps.
- Burns Quick: Slice thinner or lower the cookin’ heat. Patience, grasshopper.
Why This Matters to Me (and Should to You)
I gotta be honest—makin’ bacon changed how I see food. It’s not just eatin’; it’s creatin’. First time I got it right, I felt like a freakin’ wizard. My fam couldn’t stop ravin’, and now it’s a thing we do together sometimes. It’s slow, yeah, but in a world where everythin’s instant, takin’ a week to craft somethin’ this good feels… groundin’. You get me?
Plus, you start appreciatin’ the craft behind food. Every strip’s a lil’ story of your effort. And when you share it—whether it’s a big brunch or just sneakin’ a piece to a friend—it’s personal. We at our lil’ corner of the internet wanna inspire y’all to get hands-on with your eats. Ain’t nothin’ more satisfyin’ than bitin’ into somethin’ you made from the ground up.
Extra Tips to Level Up
Wanna take your bacon game further? Peep these hacks I’ve picked up:
- Herb It Up: Toss fresh thyme or rosemary into the cure mix for a fancy vibe.
- Double Batch: Cure two slabs at once. Freezin’ means you’re stocked for ages.
- Fat Renderin’: Save the fat that cooks off for fryin’ other stuff. It’s liquid gold.
- Experiment Wild: Try honey instead of sugar, or add some crushed juniper berries if you’re feelin’ adventurous.
If you got a grill, you can even cook your bacon over open flame for a charred edge. Just watch it close—fat flares up quick. I’ve lost a couple strips to fire, and it ain’t fun.
Wrappin’ It Up with Some Bacon Love
So there ya have it, folks—a full-on guide to turnin’ pork belly into bacon that’ll make your taste buds dance. It’s a labor of love, no doubt, but once you nail it, there’s no goin’ back to the store stuff. We’re rootin’ for ya to give this a shot and make it your own. Got a weird spice combo you wanna try? Do it. Wanna skip smokin’ and keep it simple? That’s cool too.
Drop a comment or hit us up if you run into snags or just wanna share how it turned out. I’m curious to hear what y’all come up with. For now, get that pork belly, roll up your sleeves, and let’s make some magic happen in the kitchen. Catch ya on the flip side, and happy bacon-makin’!
Rinse & Dry The Pork Belly
After 7 days, the pork belly should be fully cured. The meat is cured when it feels firm to the touch. If you have any doubts, there’s no harm in letting the meat cure for an additional day or two.
This photo shows how the meat looks after curing.
Bob gave each piece a thorough rinse under cold running water to remove excess cure, then patted the meat dry with paper towels. If you’re sensitive to salty foods, you can take the optional step of soaking the pieces in cold water for an hour or two after rinsing to remove more salt. Before you soak the meat in water, you can test it for saltiness by trimming off a small piece, frying it, and tasting it.
This photo shows how the meat looks after rinsing.
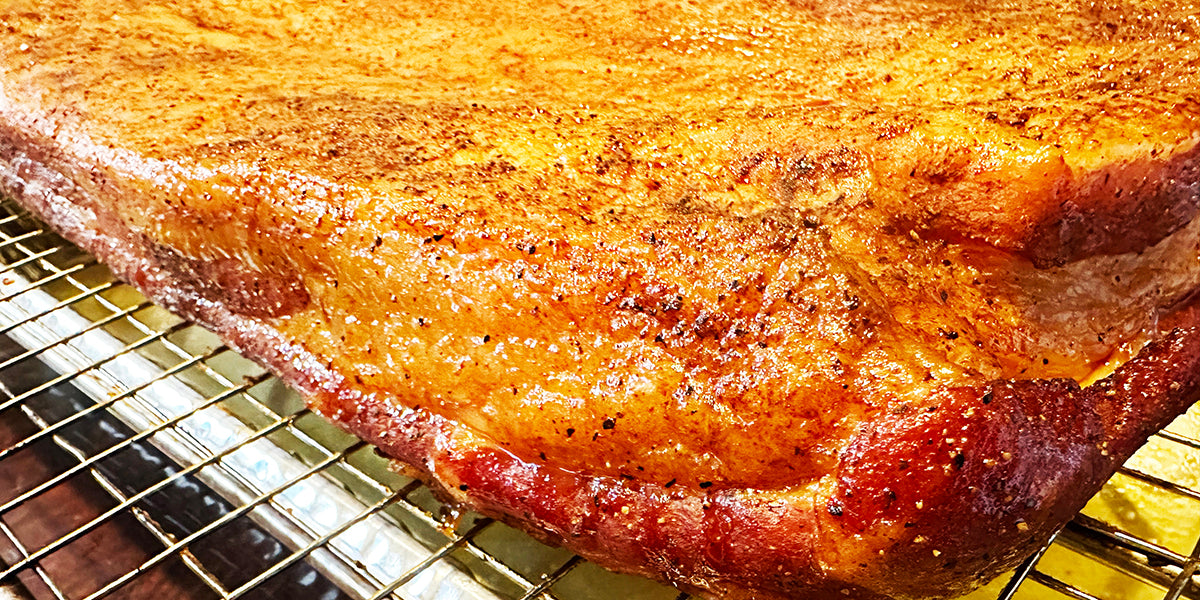
Next, Bob placed the pork belly pieces on a wire cooling rack over a rimmed baking sheet pan and allowed the meat to dry uncovered in the refrigerator for 8 hours. This causes a pellicle to form, a sticky layer resulting from water-soluble proteins being drawn to the surface of the meat by the rub. This layer attracts and holds smoke particles during cooking.
This photo shows how the meat looks after 8 hours of drying in the refrigerator. Bob has pressed some additional black pepper into the piece on the left before it goes into the smoker.
Buy Skinless Pork Belly Whenever Possible
One advantage of the pork bellies at Costco is that they’re sold skinless, meaning that the skin (also known as the rind) has been removed during processing. Skinless pork bellies are desirable because they cure evenly and provide good smoky flavor on both sides of the meat when smoked.
If your pork belly comes skin-on, you have three choices:
- If you have decent knife skills and a sharp butcher knife, your best bet for even curing and smoking is to remove the skin at the beginning of the process. This video shows how it’s done by a professional chef. Don’t worry about removing it in a single piece like the guy in the video, just take care to remove as little of the delicious pork fat under the skin as possible.
- You can cure the pork belly skin-on, then remove it after curing but before smoking. Some people find it’s easier to remove the skin after curing, but you risk uneven curing of the meat itself.
- You can cure and smoke the pork belly skin-on, then remove it after smoking. The skin comes off very easily after smoking, but you risk not only uneven curing of the meat but you lose most of the smoke flavor on the skin side of the meat.
How do you know if your pork belly is skin-on? One side will have a tough exterior layer that looks similar to your own skin. There may be a pink or purple USDA inspection stamp on the skin, and if you see nipples—yes, nipples—you know for sure that you’ve got skin-on pork belly.
Easy Homemade Bacon Recipe | How to Cure Bacon at Home | Pork Belly to Bacon
FAQ
Can pork belly be made into bacon?
Homemade Bacon. Any pork belly will work, but I recommend finding the best quality you can. Skin on or off doesn’t matter. If you’re lucky enough to have a real butcher, you can ask them to take the skin off to make your life a little easier.
How to make bacon from pork belly without a smoker?

To make bacon from pork belly without a smoker, you’ll need to cure and cook it. Curing involves using a salt and sugar mixture to draw out moisture and add flavor.
Do you remove skin from pork belly before making bacon?
You can cure the pork belly skin-on, then remove it after curing but before smoking. Some people find it’s easier to remove the skin after curing, but you risk uneven curing of the meat itself. You can cure and smoke the pork belly skin-on, then remove it after smoking.