Until I was about forty years old I never thought to learn how to make Canadian bacon. I never even heard of Canadian bacon! Growing up in Ohio, we always had our own smoked bacon, fresh bacon and salted pork bacon. It all came from the pigs which we raised and butchered. Dad and the boys (My brothers) finished the curing process after out fall butchering. Thinking back, I would not have cared to have any other type.
After moving to Florida, my husband and I were invited to a brunch at the country club. On the brunch table was a pretty tray of individual servings of Eggs Benedict. At that time I did not even know what Eggs Benedicts were. I could see the eggs were very soft, I figured most likely poached. I was never found of soft cooked eggs so they really did not appeal to my taste buds. At that moment I really didn’t think I would want to learn how to make Canadian bacon especially for this egg recipe. Our host really liked Eggs Benedict so of course we were encouraged to try one. It did not take much encouragement for my husband being a great lover of poached eggs. Needless to say, he loved the whole dish; eggs, meat, muffin and the creamy sauce. Immediately he said, “You have to learn to make these”. I tried one also but I must admit I was more impressed with the meat than the poached eggs. I really like the Canadian bacon and the creamy sauce was also very good. I asked what they were call and gathered as much information as I could about making them. A few days later while at the grocery store, I picked up some of the bacon so I could try making the Eggs Benedict. The Canadian bacon did not look the same as what was used at the country club but it is all that was available. After my first attempt in making Eggs Benedict, I realized this Canadian bacon was not as good either. I tried several brands of Canadian bacon from other supermarkets and in my opinion none was very good. I knew then that I was going to have to learn how to make Canadian bacon myself. I really had no idea where to start in learning how to make Canadian bacon. This is about the only recipe I did not have. I found that it is not actually “Canadian” bacon. I first read that it originated in the Northwest part of the United States. Then I read that the name came out of Britain importing pork from Canada years ago when they were experiencing a met shortage. I suppose that could be if the pork had been cured for shipping, but the United States is the only place which refers to this meat as “Canadian” bacon. The point is that if I was going to figure out how to make Canadian bacon, I had to start somewhere. I remembered that I had some Morton Tender Quick curing salt on hand which I use for making salami and other preserving. I went on the website of Morton Meat Cure and sure enough, there was a recipe. It is quite easy to make. Try their recipe below (Check out their website for other information).
Hey there, fellow food lovers! If you’ve ever drooled over a hearty breakfast sandwich or a fancy Eggs Benedict and wondered how to make that delicious Canadian bacon yourself, you’re in the right spot. I’m stoked to walk ya through the process of crafting Canadian bacon at home using Morton Tender Quick. Trust me, it ain’t as hard as it looks, and the payoff? A slice of heaven that’s way better than store-bought. Let’s dive into this meaty adventure and get that pork loin transformin’ into somethin’ downright scrumptious!
What Even Is Canadian Bacon, Anyways?
Before we get our hands dirty, let’s chat about what Canadian bacon really is. Unlike the crispy, fatty strips of regular bacon we all know, Canadian bacon comes from the lean pork loin—yep, that tender part of the pig’s back. It’s cured, often smoked, and got a texture more like ham, with a salty, smoky vibe that pairs perfect with eggs or in a sammich. It’s leaner, thicker, and got that bright pink color that screams “I’m fancy!”
Why make it at home? Well, I reckon it’s all about controllin’ the flavor and knowin’ exactly what’s in your food. Plus, there’s somethin’ mighty satisfyin’ about slicin’ into a piece of bacon you cured with your own two hands Morton Tender Quick, a special curing mix, is gonna be our secret weapon here It’s got salt and sugar built in to preserve the meat and give it that signature taste. Ready to roll? Let’s do this!
Gatherin’ Up What You Need
First things first let’s round up the goods. You don’t need a ton of fancy stuff to make Canadian bacon just a few basics. Here’s the rundown
- Pork Loin: Grab a boneless pork loin, around 5 pounds works great. This is the star of the show, so pick a nice one with minimal fat.
- Morton Tender Quick: You’ll need 1 tablespoon of this curing mix per pound of pork. It’s a blend that does the heavy liftin’ for preservin’ and flavorin’.
- Granulated Sugar: Use 1 teaspoon per pound of pork. This lil’ touch balances out the saltiness with a hint of sweet.
- Water: Just for rinsin’ and soakin’ later on.
- Optional Flavor Boosters: If you’re feelin’ adventurous, toss in some garlic, bay leaves, or whole peppercorns to the curing mix for an extra kick.
Tools You’ll Wanna Have Handy
Ain’t no need for high-tech gear here. Just some kitchen basics will do the trick:
- A sharp knife for trimmin’ the pork loin.
- A big bowl or container for the curing process.
- Plastic wrap or zip-top bags to seal in the goodness.
- A smoker or oven for the final cookin’ step (don’t worry, I’ll cover both options).
- Paper towels for dryin’ off the meat.
Got all that? Sweet! Let’s move on to the nitty-gritty of makin’ this bacon happen
Step-by-Step: Craftin’ Your Canadian Bacon
I’m gonna break this down into easy steps so you can follow along without breakin’ a sweat. This process takes a bit of patience—mostly waitin’ time—but it’s worth every darn minute. Here we go!
Step 1: Prep That Pork Loin
Start by takin’ your pork loin and givin’ it a good look-over. You wanna trim off any excess fat or that shiny silver skin that might be hangin’ on. It don’t gotta be perfect, just clean it up a bit. Rinse it under cold water if it’s lookin’ a tad messy, then pat it dry with some paper towels. We’re settin’ the stage for the cure to work its magic.
Step 2: Mix Up the Curing Goo
In a small bowl, mix together 1 tablespoon of Morton Tender Quick and 1 teaspoon of sugar for every pound of your pork loin. So, if you got a 5-pound loin, that’s 5 tablespoons of Tender Quick and 5 teaspoons of sugar. Stir it up good. If you’re usin’ extras like garlic or peppercorns, toss ‘em in now for a lil’ flair. This mix is gonna turn that plain pork into somethin’ special.
Step 3: Rub It Down Real Nice
Take that curing mixture and rub it all over the pork loin. I mean, really get in there—cover every inch of that meat. Don’t be shy! Once it’s coated, wrap it up tight in plastic wrap or slide it into a zip-top bag. Make sure it’s sealed good so no air gets in. This is where the flavor starts soakin’ in, so don’t skimp on the rubbin’.
Step 4: Let It Cure in the Fridge
Pop that wrapped-up loin into the fridge and let it sit for 3 to 5 days. You gotta keep it cold—around 40°F or below—for safety, so no cheatin’ by leavin’ it out. Turn it over every now and then, maybe once a day, to make sure the cure gets evenly distributed. You’ll notice the meat firm up as it cures—that’s a good sign! I usually go for the full 5 days ‘cause I like that deep flavor, but 3 days works if you’re itchin’ to eat sooner.
Step 5: Rinse and Soak It Off
After the curin’ time’s up, take the loin out and unwrap it. Give it a good rinse under cold water to wash off the excess cure mix. You don’t want it too salty, right? Then, soak it in a bowl of fresh, cold water for about 30 minutes. This step pulls out even more salt from the surface. After soakin’, pat it dry with paper towels. We’re gettin’ closer to the good part!
Step 6: Dry It Out a Bit
Now, let the pork loin chill in the fridge, uncovered, for a few hours or even overnight. This dries out the surface just a smidge, which helps when we smoke it. A dry surface grabs that smoky flavor better. If you’re in a rush, you can skip straight to smokin’, but I find this lil’ wait makes a difference.
Step 7: Smoke It to Perfection
Time to add that smoky goodness! If you got a smoker, heat it up to 225°F and place the pork loin inside. Smoke it until the internal temp hits 145°F. This usually takes a few hours, so keep an eye on it. If you ain’t got a smoker, no worries—you can use your oven. Set it to the same temp, 225°F, and cook it on a rack over a tray till it reaches 145°F. You won’t get the full smoky vibe, but it’ll still be darn tasty. I’ve done it both ways, and while smokin’ is my jam, the oven still gets the job done.
Step 8: Slice and Cook It Up
Once it’s smoked and cooled a bit, let it rest for an hour or so. Then, grab a sharp knife and slice it into pieces—about 1/8 inch thick works perfect. Heat up a skillet over low heat, brush it with a lil’ oil, and fry the slices for 8 to 10 minutes, turnin’ ‘em to brown both sides nice and even. Watch out, they cook quick! You’ll smell that amazing aroma fillin’ your kitchen—pure bliss.
Why You’ll Be Hooked on This
Now that you’ve got your homemade Canadian bacon, lemme tell ya why it’s gonna be your new obsession. First off, the flavor is outta this world—salty, smoky, with just a hint of sweet from the sugar. It ain’t greasy like regular bacon, so it feels a tad healthier (though let’s not kid ourselves too much). And versatility? Oh man, you can use it in so many ways. Here’s a few ideas to get your mouth waterin’:
- Breakfast Sandwiches: Stack it with an egg and cheese on an English muffin for a killer mornin’ bite.
- Eggs Benedict: Swap out ham for your Canadian bacon—fancy brunch, here we come!
- Omelets or Frittatas: Dice it up and toss it in for a protein punch.
- Pasta Carbonara: Use it instead of pancetta for a smoky twist.
- Wraps: Roll it up with lettuce, tomato, and avocado for a quick lunch.
- Pizza Toppin’: Slice it thin and sprinkle it over a pie—trust me, it’s amazin’.
How to Keep It Fresh
Made a big batch and got leftovers? No problemo. Here’s how to store your Canadian bacon so it stays tasty:
- In the Fridge: Keep it in an airtight container or zip bag for up to a week. Make sure it’s cooled down before storin’.
- In the Freezer: Wrap slices tight in plastic wrap, then pop ‘em in a freezer bag. It’ll last 2 to 3 months easy. Thaw in the fridge when you’re ready to use it.
- Pro Tip: Slice it right before eatin’ if you can. Keeps the texture better than slicin’ it all at once.
Oh, and keep raw and cooked bacon separate in the fridge—don’t wanna mix ‘em up and risk any nasties.
FAQs: Stuff You Might Be Wonderin’
I’ve been messin’ around with curin’ meats for a while now, and I get a lotta questions from folks tryin’ this for the first time. Here’s some common ones with straight-up answers:
- Do I gotta keep the pork in the fridge while curin’? Yup, absolutely. Gotta stay at 40°F or below to keep things safe. No room temp shenanigans!
- How long should I cure it for real? Anywhere from 3 to 5 days is good. I’ve gone up to 7 days once for a stronger flavor, but 5 is my sweet spot.
- Can I use pork tenderloin ‘stead of loin? You could, but I don’t recommend it. Tenderloin’s super lean, and the loin’s got just enough fat to keep things flavorful.
- Do I gotta rinse off the cure before smokin’? Heck yeah, rinse it well. Otherwise, it’ll be salty enough to make ya pucker up somethin’ fierce.
- What if I don’t got a smoker? Like I said earlier, an oven at 225°F works fine. You miss some smokiness, but it’s still delish.
Tips and Tricks for the Best Bacon Ever
Wanna take your Canadian bacon game to the next level? Here’s a few nuggets of wisdom I’ve picked up over the years:
- Don’t Skimp on Curin’ Time: Rushin’ the cure means less flavor. Give it at least 3 days, y’all.
- Experiment with Flavors: Add a lil’ crushed garlic or some herbs to the cure mix. I tried rosemary once, and dang, it was a game-changer.
- Low and Slow Cookin’: Whether smokin’ or fryin’, keep the heat low to avoid dryin’ it out. Patience is key.
- Get a Meat Thermometer: Checkin’ that internal temp to 145°F ensures it’s cooked safe without overdoin’ it.
- Double the Batch: If you’re gonna put in the effort, might as well make extra and freeze some for later. Future you will thank ya.
Why Homemade Beats Store-Bought Every Time
I gotta say, there’s somethin’ real special about makin’ your own Canadian bacon. Store-bought stuff is fine and dandy, but it often got weird additives and way too much salt for my likin’. When you do it yourself with Morton Tender Quick, you know exactly what’s goin’ in—just pork, cure, sugar, and maybe a few extras if you’re feelin’ fancy. Plus, the pride of servin’ up a plate of bacon you made from scratch? Can’t beat that feelin’.
I remember the first time I tried this, I was nervous as heck. Thought I’d mess it up and waste a good piece of meat. But followin’ these steps, it turned out so good, my family couldn’t stop ravin’. Now, it’s a regular thing in our house, especially for big weekend breakfasts. There’s nothin’ like bitin’ into a slice and knowin’ you put in the work to make it happen.
Wrappin’ It Up with a Bow
So, there ya have it—a full-on guide to makin’ Canadian bacon at home with Morton Tender Quick. We’ve covered what it is, the stuff you need, every step from trimmin’ to fryin’, and even how to store and serve it. It’s a lil’ bit of a wait with the curin’, but the end result is so worth it. You’ll have a lean, smoky, downright delicious meat that’s perfect for breakfast, lunch, or dinner.
If you’re sittin’ there thinkin’ “I ain’t no chef, I can’t pull this off,” lemme tell ya, you totally can. I wasn’t no pro when I started, just a curious cook wanna try somethin’ new. Take it one step at a time, follow this guide, and before ya know it, you’ll be the bacon boss of your kitchen. Got questions or wanna share how yours turned out? Drop a comment below—I’d love to hear ‘bout it!
Now, go grab that pork loin and get curin’. Your taste buds are gonna thank ya big time. Catch ya later, foodies!
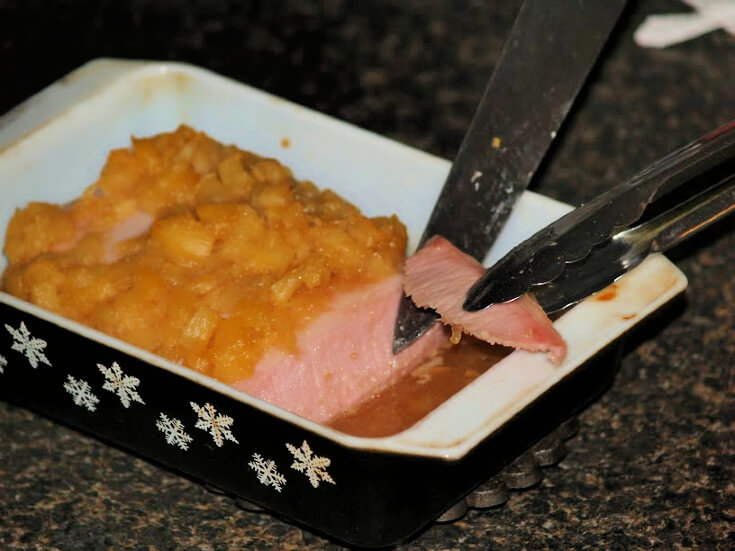
GLAZED CANADIAN STYLE BACON

When you have learned how to make Canadian bacon cook it with a glaze.
- 1 ½ Pounds (One solid piece) Canadian bacon
- 2 Tablespoons apricot preserves
- 1 Teaspoon prepared mustard
- 1 Teaspoon vinegar
Preheat oven to 325F degrees.NOTE: If you buy the bacon in a casing, remove it. Place bacon with fat side up on a piece of heavy foil (About 15X18 inches). Cut the surface of the bacon into a pattern of diamond shapes (1/4 Inch deep). Wrap securely in the foil and place on a baking tray; bake for 1 hour.OPEN FOIL and fold back. Mix preserves, mustard and vinegar together; brush over top and sides of meat. Bake uncovered for 15 minutes or until internal temperature reaches 160 F degrees; slice and serve. Serves 6.
BACON LIVER PATE RECIPE
Learn how to make Canadian bacon to use in this delicious liver pate.
- 1 Pound Canadian bacon
- 1 ½ Pounds pork liver
- 1 Cup lard (Melted)
- 1 Beaten egg
- 1 Tablespoon flour
- Salt/ pepper to taste
- ½ Teaspoon allspice
Preheat oven to 350F degrees. Lightly grease a large loaf pan or casserole baking dish. Chop bacon and liver; run both through a food grinder. Gradually beat melted lard into the ground meats in a bowl. Mix beaten egg with flour, salt, pepper and allspice. Add egg mixture to ground meat mixture; mix well. Spoon into prepared pan or dish smoothing top. Cover top with foil; place in a large pan containing 1 inch of water. Bake for 1 hour and 45 minutes; let cool on rack then refrigerate 2 to 3 days. Great with fresh crusty bread; serves 12.