Hey there, bacon lovers! If you’re anything like me, the smell of sizzling bacon gets your mouth waterin’, but the greasy splatters all over the kitchen? Ugh, not so much I’ve been there, scrubbing down countertops while my bacon gets cold. But lemme tell ya, I found a game-changer cookin’ bacon in a Dutch oven. This bad boy ain’t just for stews and roasts—it’s your ticket to perfectly crispy bacon with way less hassle. Whether you’re at home or out campin’, a Dutch oven can handle it all So, grab that heavy pot, and let’s dive into how to cook bacon in a Dutch oven like you’ve been doin’ it forever!
Why a Dutch Oven for Bacon? The Quick Lowdown
Before we get to the nitty-gritty, lemme hit ya with why a Dutch oven is the MVP for bacon. It’s got a big surface area, so you can cook a whole pack at once—perfect for feedin’ a crowd or meal preppin’. The heavy lid traps heat and keeps those annoying grease splashes contained. Plus, it cooks super even, so no more half-burnt, half-raw strips. And here’s a bonus: the bacon fat kinda seasons the pot over time, makin’ it even better for future dishes. Let’s just say, once you try this, you might never go back to a regular skillet.
Method 1: Stovetop Bacon in a Dutch Oven (Mess-Free Magic)
Let’s kick things off with the stovetop method ‘cause it’s prob’ly the most handy for everyday cookin’. If you’re sick of grease flyin’ everywhere, this is gonna be your jam. A Dutch oven’s tall sides and lid make it a fortress against splatter. Here’s how we do it at my place:
- Gear Up: Grab your Dutch oven—enamel-coated cast iron is best ‘cause it don’t react with bacon grease. Stainless steel works too if that’s whatcha got. No need for oil; bacon’s got enough fat to handle its own.
- Heat It Up: Set that pot on medium-high heat on your stove. Let it warm up for a minute or two. Don’t crank it to high, or you’ll scorch your bacon before it crisps.
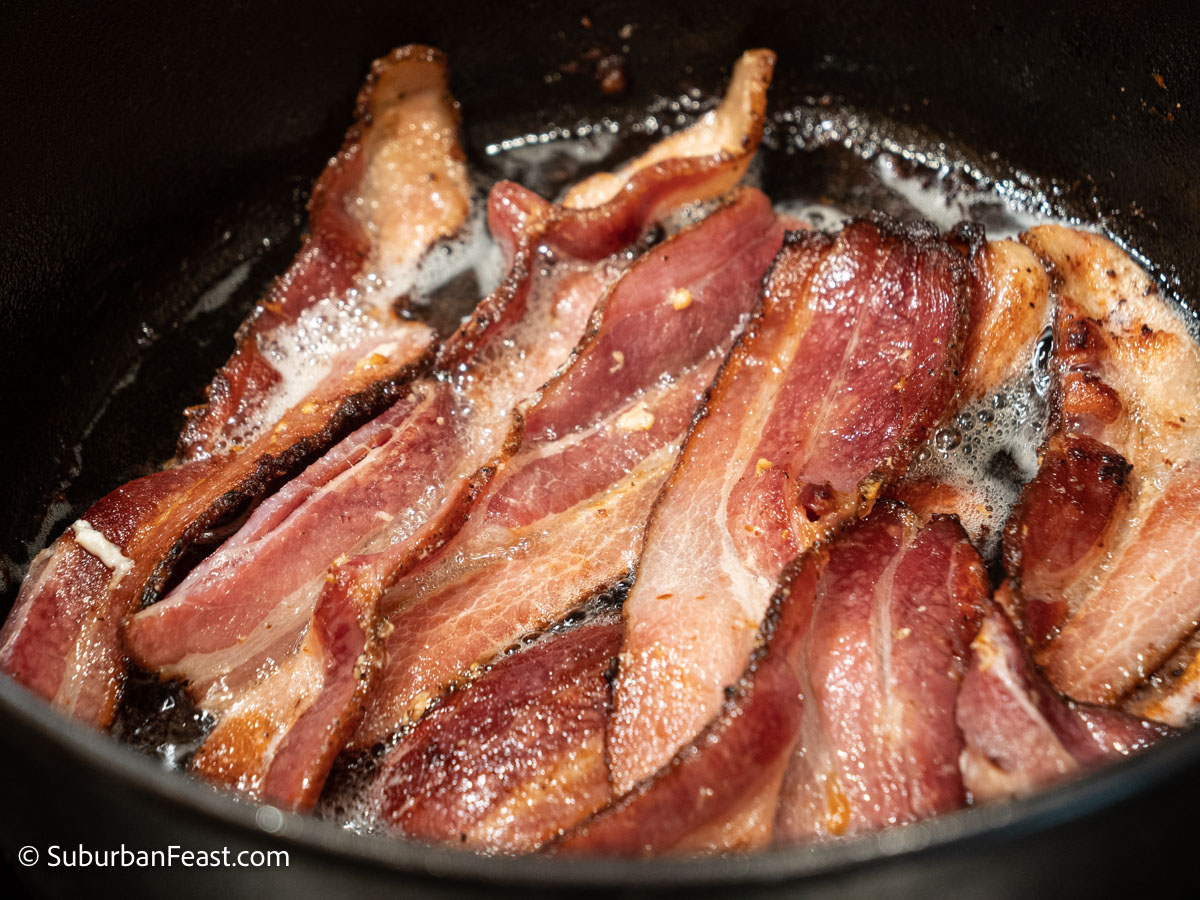
- Lay It Down: Toss in your bacon strips in a single layer. Don’t overlap ‘em too much, or they won’t cook even. Work in batches if you’re doin’ a big pile.
- Flip and Fry: Let it sizzle for a few minutes, then flip the strips with tongs. Keep flippin’ every couple minutes till it’s as crispy as you like. Usually takes about 8-12 minutes, dependin’ on how thick your bacon is.
- Drain and Done: Once it’s golden and crunchy, pull the bacon out with tongs and lay it on a plate lined with paper towels to soak up extra grease. Boom, you’re eatin’ good!
Pro Tip If you wanna cut down mess even more tilt the lid on just a bit while cookin’. It’ll catch most splatters but still let you peek in. Oh and if you’re feelin’ fancy, toss some onions or spinach in with the bacon near the end for a killer breakfast mix.
Method 2: Oven-Baked Bacon in a Dutch Oven (Hands-Off Heaven)
Now, if you’re more of a “set it and forget it” kinda cook, baking bacon in a Dutch oven is gonna blow your mind I love this method when I’m busy with other stuff ‘cause there’s no babysittin’ required Here’s the deal
- Preheat First: Crank your oven to 400°F. While it’s heatin’, line a big baking sheet with foil to catch grease. If you’ve got a metal cooling rack that’s oven-safe, set it on top of the foil for extra crispy results.
- Arrange the Bacon: Lay your bacon strips in a single layer on the foil or rack. No overlappin’, alright? If you’re usin’ the Dutch oven itself, you can place the bacon directly in it, but I find a sheet pan setup works better for big batches.
- Bake Away: Pop it in the oven and let it bake for about 15-20 minutes. No need to flip— the heat gets all sides nice and even. Check at 15 minutes; if it ain’t crispy enough, give it a few more.
- Cool and Crunch: Use tongs to move the bacon to a paper-towel-lined plate. Let it cool a tad, and you’ve got perfect strips ready to go.
Little Secret: For super-duper crispy bacon, that cooling rack is key. It lets the grease drip off, so every inch gets crunchy. I’ve burnt my share of bacon before figurin’ this out, so trust me on this one.
Method 3: Campfire Bacon in a Dutch Oven (Outdoor Vibes)
Alright, for my outdoor peeps, this one’s for you. Cookin’ bacon over a campfire in a Dutch oven is straight-up magical. It’s perfect for campin’ trips or just a backyard fire pit sesh. Here’s how I roll when I’m out in the wild:
- Fire It Up: Get your campfire or grill goin’ with medium-high heat. Use charcoal briquettes or big wood chips for steady heat. You want about 16-18 briquettes ready with white ash on ‘em.
- Prep the Pot: Set your Dutch oven near the fire to warm up for a few minutes. Toss in the bacon strips—again, single layer, no crowdin’.
- Slow and Steady: Cook it over low to medium heat, stirrin’ or flippin’ occasionally with tongs. Takes a bit longer than indoors, maybe 10-15 minutes, but that smoky flavor? Worth it.
- Lid On, Heat Up: Pop the lid on and place some briquettes on top (like 10 or so) to keep heat even. Check every few minutes till it’s crisp.
- Serve It Hot: Scoop out the bacon with a slotted spoon or tongs, drain on paper towels, and dig in. Bonus points if you cook some eggs or taters in the leftover grease right after.
Heads Up: Fire heat ain’t as predictable as a stove, so keep an eye out. If it’s gettin’ too hot, move the pot a bit away from the main flames. I’ve learned this the hard way after charrin’ a batch or two!
Why We’re Obsessed with Dutch Oven Bacon
Now that ya know the how, let’s chat about why we keep comin’ back to this method. I’ve cooked bacon every which way—stovetop skillets, microwaves, even griddles—but a Dutch oven just hits different. Here’s the breakdown:
- Big Batches, No Prob: That wide surface means you can cook a pound at once. Feedin’ a hungry crew at brunch? Done.
- Even Cookin’: The heavy cast iron spreads heat like a dream. No more weird undercooked spots.
- Less Mess: The tall sides and lid trap grease splashes. My kitchen stays cleaner, and I ain’t dodgin’ hot oil like a ninja.
- Versatility Vibes: Indoors, outdoors, oven, stove—Dutch oven don’t care. It works everywhere.
- Seasonin’ Bonus: Each time you cook bacon, the fat builds up a lil’ non-stick layer in the pot. Future meals just get easier.
I’m tellin’ ya, once you go Dutch for bacon, it’s hard to go back. It’s like upgradin’ from a flip phone to a smartphone—whole new level of awesome.
Gettin’ Your Dutch Oven Ready for Bacon Action
Before ya start sizzlin’, let’s make sure your Dutch oven is good to go. A lil’ prep goes a long way to keep things from stickin’ and to get that perfect cook. Here’s what I do:
- Clean It Good: If your pot’s been sittin’ around, scrape off any old bits with a plastic scraper. Wipe it down with a paper towel. If it’s real dirty, a quick rinse with warm water and mild soap does the trick. Dry it completely—rust ain’t your friend.
- Season That Baby: Rub a thin layer of veggie oil or shortening all over, inside and out. Heat it up at 350-400°F for about an hour, upside down, either in the oven or over a campfire. This builds a protective coat that keeps food from stickin’ and adds flavor over time.
- Pre-Cook Check: Dependin’ on your method, you might wanna add a tiny bit of oil to the bottom before bacon goes in, ‘specially if your seasoning layer is new. Most times, though, bacon fat handles it.
After cookin’, let the pot cool down before cleanin’. Scrape leftovers, wipe out grease, and re-season if needed. Treat it right, and this pot’ll be your bacon buddy for life.
Tips and Tricks for Bacon Perfection
Cookin’ bacon in a Dutch oven can be tricky at first, but I’ve got some insider hacks to make sure yours turns out flawless every dang time. Check these out:
- Chill It First: Pop your bacon in the fridge or freezer for a bit before cookin’. Cold bacon crisps up better and don’t curl as much.
- Low Heat Wins: High heat burns fast. Stick to medium or lower to cook slow and even. Patience pays off with that crunch.
- Lid Power: Use the lid to trap heat and flavor, ‘specially on stovetop or campfire. Just don’t seal it tight if you need to check often.
- Rack for Crunch: In the oven, a cooling rack over foil lets grease drip off for extra crispy strips. No soggy bacon here!
- Flip It Good: Turn the strips halfway through, no matter the method. Both sides gotta get that golden love.
- Drain That Grease: After cookin’, don’t let bacon sit in its own fat. Paper towels soak it up so it stays crisp, not greasy.
One time, I forgot to drain the grease and ended up with soggy strips—total bummer. Don’t make my mistake!
What If Things Go Sideways? Troubleshootin’ Bacon Woes
Even with a Dutch oven, bacon can throw ya curveballs. Here’s how I handle the common hiccups:
- Bacon Sticks to Pot: If it’s stickin’, your pot might not be seasoned enough. Add a smidge of oil next time, and re-season after cleanin’. Also, don’t move the bacon too early—let it release naturally as it cooks.
- Uneven Cookin’: Crowdin’ the pot is usually the culprit. Cook in smaller batches so heat gets around. If it’s still uneven, check your heat source—move briquettes or adjust stove knobs.
- Too Greasy: Didn’t drain it well? Double up on paper towels post-cook. Or use that cooling rack trick in the oven to let fat drip off.
- Burnt Bacon: Heat too high, my friend. Drop it down next round and keep a closer eye. Takes just a sec to go from perfect to charcoal.
I’ve had my share of burnt batches, ‘specially over a campfire when I got distracted by the scenery. Lesson learned: set a timer if ya gotta.
Bonus: What to Do with Bacon Grease?
Don’t just chuck that leftover grease—it’s liquid gold! Here’s how we use it at home:
- Save for Later: Strain it into a glass jar and stash in the fridge. Use it to fry eggs, roast veggies, or add flavor to beans.
- Dispose Smart: Never pour it down the sink unless ya want clogged pipes. Let it cool in a throwaway container, harden up, then toss in the trash.
I’ve saved many a meal with a spoonful of bacon grease for extra oomph. It’s like a secret weapon in the kitchen.
Pairin’ Your Bacon with the Good Stuff
Now that you’ve got crispy bacon straight from the Dutch oven, whatcha gonna eat it with? Here are some ideas I swear by:
- Classic Breakfast: Eggs any style, toast, and a side of hash browns. Simple but hits every time.
- Brunch Crowd-Pleaser: Stack it on avocado toast or toss into a big salad for protein punch.
- Next-Level Sammies: BLTs, bacon cheeseburgers, or even a bacon-egg sandwich. Can’t go wrong.
- Recipe Add-In: Crumble it over soups, casseroles, or baked potatoes for that smoky kick.
Last weekend, I whipped up a bacon and egg scramble right in the Dutch oven after fryin’ the strips. One-pot wonder, and cleanup was a breeze!
Wrappin’ It Up: Your New Bacon Game
So there ya have it, folks—everything ya need to know about how to cook bacon in a Dutch oven. Whether you’re fryin’ on the stovetop, bakin’ in the oven, or gettin’ rustic over a campfire, this pot’s got your back. It’s all about less mess, more flavor, and bacon so crispy you’ll be braggin’ to your buddies. I’ve been hooked ever since I ditched my old skillet, and I bet you’ll be too. So, fire up that Dutch oven, toss in some bacon, and let’s get sizzlin’. Drop a comment if ya try it out—I wanna hear how it went! And hey, if ya got your own tricks, spill ‘em. We’re all about sharin’ the love for good eats here.
Broiled Bacon
:max_bytes(150000):strip_icc()/__opt__aboutcom__coeus__resources__content_migration__serious_eats__seriouseats.com__2019__03__20190306-best-way-to-cook-bacon-vicky-wasik-broiler-burnt-1500x1000-f77fd6c95fc44731afc303e588589f2b.jpg)
My attempts at broiling bacon didnt leave me with much positive to say about it. The intense heat of the broiler singes the bacon, especially where it curls upward from the heat. Unless you like bacon with seriously burnt edges, Id skip it.
How to Grill Bacon
:max_bytes(150000):strip_icc()/__opt__aboutcom__coeus__resources__content_migration__serious_eats__seriouseats.com__2019__03__20140421-grilled-chicken-sandwich-colombian-bacon-potato-chip-green-sauce-recipe-02-large-1500x1125-f07e009d61374e5297df86dfc7b138df.jpg)
The first thing to know about grilling bacon is that thin rashers are a disaster. They scorch on the grill grates in a matter of seconds, or stick and tear, or flop down between them and burn. You need thick-cut bacon for a grill; extra-thick is even better.
:max_bytes(150000):strip_icc()/__opt__aboutcom__coeus__resources__content_migration__serious_eats__seriouseats.com__s__2015__11__20151119-smoked-turkey-food-lab-13-1500x1125-a58e31e1962d44078a6b5a9a373377d5.jpg)
Cooking bacon on the grill is best done over a two-zone fire, with the bacon arranged right on the edge of the two zones. This way its close enough to the direct heat to crisp it but not so close that it gets hammered and burns. With a two-zone fire, you can also move the bacon around, away from the coals if its threatening to burn before enough of the fat has rendered, or sliding it over them if the bacon needs more browning and crispness. Flipping the bacon frequently throughout helps mitigate the risk of burning even more.
Dr. Ken Berry’s method of Cooking Bacon in a Pot Version 2.0 #Carnivore #AnimalBased
FAQ
Can I make bacon in a dutch oven?
Best way to make bacon Instead of cooking in a skillet, Liz uses a dutch oven pot to make twisty, curly, crunchy bacon. This tip is also great to help keep popping grease more contained.
Can I use a dutch oven as a frying pan?
Can you fry in a Dutch oven? Absolutely! Dutch ovens are perfect for frying due to their excellent heat distribution and retention. Just remember to check that your dutch oven is cast iron and suitable for stovetop use.
Is it better to bake bacon at 350 or 400?
How to cook bacon in the oven without getting grease everywhere?
Line a large baking sheet with aluminum foil, making sure the pan is completely covered. Check that the foil extends up the sides of the pan so it captures all the bacon grease and cleanup is easier.Mar 11, 2022