The best feeling is when you preserve something that you usually buy at a grocery store. Growing up, each year, Mom would can 30+ quarts of green beans. Because of this, the process has become second nature to me.
I’ve always pressure canned green beans. That’s what Grandma and Mom always said was best and it makes sense. Why? Well, beans are very low in acid, so to ensure all the microorganisms and bacteria are killed, pressuring is the best way. It allows a much higher temperature to kill all contaminants.
Pressure canning sounds scary to many, but once you read the instructions and do it once, you’ll be a pro! When you are so used to canning like I am, it can be hard to pin down a recipe. So here’s the most common way we pressure our beans.
Food safety tip: This recipe may not be approved by the USDA. To prevent the risk of botulism, always check with the USDA Canning Guide.
Hey there, kitchen warriors! If you’re lookin’ to level up your food preservation game, I’ve got somethin’ special for ya today. We’re talkin’ about canning green beans with bacon—a combo that’s gonna make your taste buds do a happy dance and keep your pantry stocked with some serious flavor. This ain’t just about savin’ veggies for later; it’s about lockin’ in that smoky, savory goodness that only bacon can bring. Whether you’re a homesteader, a prepper, or just someone who loves a good side dish, I’m gonna walk ya through every step of this process. So, grab your apron, and let’s get to work!
Why Can Green Beans with Bacon? The Flavor Magic
Before we dive into the nitty-gritty, let’s chat about why you’d wanna can green beans with bacon in the first place Green beans on their own? They’re fine, I guess. Nutritious, easy to grow, and a staple in many a garden. But let’s be real—they can be kinda blah without some help That’s where bacon struts in like the hero it is. That salty, smoky vibe mixes with the earthy beans, creatin’ a dish that’s pure comfort food. When you can ‘em together, you’re not just preservin’ food; you’re bottlin’ up a ready-to-go side dish that’s gonna impress at any meal.
Plus canning your own stuff means you know exactly what’s in there. No weird preservatives or crazy sodium levels like some store-bought cans. And if you’re like me there’s somethin’ mighty satisfyin’ about seein’ rows of jars on the shelf, knowin’ you made that happen. So, let’s roll up our sleeves and make some magic!
What You’ll Need: Gear and Goodies
Canning ain’t hard, but it does need the right tools and ingredients Here’s the rundown of what we’re workin’ with to can green beans with bacon I’ve put it in a neat lil’ table so you don’t miss nothin’.
| Item | Purpose | Notes |
|---|---|---|
| Green Beans | The star of the show | Fresh from garden or market, about 1 lb per quart jar |
| Bacon | Flavor bomb | Use as much as ya like, I go for 1 lb per 3 lbs of beans |
| Onions | Extra taste kick | Diced, about 1 medium per 3 lbs beans |
| Garlic | Another flavor layer | Minced, to taste |
| Quart or Pint Jars | Storage containers | 1 quart or 2 pints per lb of beans |
| Pressure Canner | Safe canning for low-acid foods | Gotta have this, no water bath here! |
| Jar Lids and Rings | Seal the deal | New lids for safety, reuse rings if good |
| Colander & Large Pot | Preppin’ beans and mixin’ stuff | For rinsing and holding |
| Vinegar & Small Rag | Clean jar rims | Cuts grease from bacon, crucial step |
Got all that? Good! If you’re missin’ somethin’, hit up your local store or borrow from a neighbor. Now, let’s talk safety real quick—canning green beans (a low-acid food) with bacon means we gotta use a pressure canner. Water bath canning won’t cut it here ‘cause it don’t get hot enough to kill off nasty bugs like botulism. Safety first, y’all!
Step-by-Step: How to Can Green Beans with Bacon
Alright, let’s get down to business. I’m gonna break this into clear steps so even if you’ve never canned a thing in your life, you’ll feel like a pro by the end. This method is somethin’ my grandma used to do, and I’ve tweaked it over the years to make it work for me. Follow along, and you’ll have jars of bacony goodness in no time.
Step 1: Prep Your Gear
First things first, get your canning setup ready. Wash your jars, lids, and rings with hot soapy water. You don’t gotta boil the lids anymore—modern ones just need to be clean. But I like to keep ‘em in a pot of warm water (not hot enough to burn my fingers) so they’re ready to go. A lil’ trick I picked up is to pop the jars on a cookie sheet and stick ‘em in a 250-degree oven to keep ‘em warm while I prep. This helps prevent breakage when you fill ‘em with hot stuff.
Get your pressure canner goin’ too. Fill it with about 3 inches of water and start heatin’ it up. Check your canner’s manual for exact amounts, but that’s usually the sweet spot. We’re not processin’ yet, just gettin’ ready.
Step 2: Prep Your Green Beans
Grab your fresh green beans and give ‘em a good rinse. Snap off the ends and cut ‘em into about 1-inch pieces. Don’t parboil ‘em—trust me, that’ll make ‘em mushy after canning. We’re raw packin’ these babies so they keep some bite after processin’. Toss the cut beans into a big bowl or pot for now.
Step 3: Cook the Bacon Mix
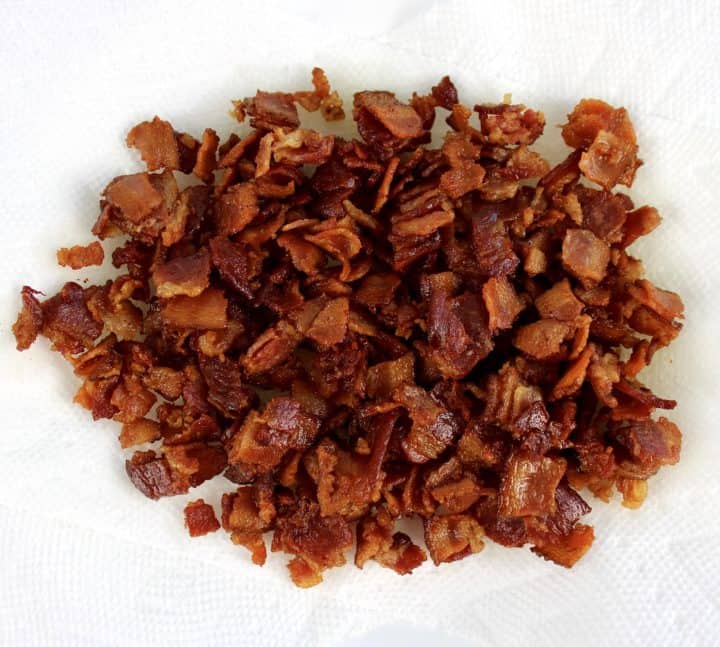
Now for the fun part—bacon time! Cut your bacon into small pieces, maybe an inch or so. Throw it in a skillet over medium heat. While it’s sizzlin’, dice up some onion and mince a bit of garlic if you’re usin’ it. Add those to the pan with the bacon and cook ‘til the bacon’s just done—not crispy, just cooked through. Drain off most of the fat (save it for somethin’ else if ya want), then mix this bacon-onion-garlic goodness into the bowl with your green beans. Stir it up real good so every bean gets a taste of that flavor.
Step 4: Pack the Jars
Pull your warm jars outta the oven (careful, they’re hot!). Stuff ‘em full with the green bean and bacon mix. I mean stuff ‘em—pack it tight or you’ll end up with more water than beans in there. I use the handle of a wooden spoon or a pestle to really push it down. Leave about a half-inch of headspace at the top—that’s important for a good seal.
Once packed, take the jar to the sink and fill it with plain ol’ water up to that half-inch mark. No need for hot water here; room temp works fine. Since we’ve got bacon in the mix, grab a rag with a splash of vinegar on it and wipe the rim of the jar real good. This cuts through any grease that might mess up the seal. Pop on a lid and screw on a ring, just finger-tight. Don’t crank it down like you’re fixin’ a car tire.
Step 5: Pressure Can the Jars
Load your filled jars into the pressure canner. Follow your canner’s instructions for lockin’ the lid and bringin’ it up to pressure. For most folks at sea level, you’ll process quart jars at 10 pounds of pressure for 25 minutes, and pint jars for 15 minutes. If you’re at a higher altitude, check your manual for adjustments. Once the time’s up, turn off the heat and let the pressure drop naturally—don’t force it by openin’ the vent or you’ll risk breakin’ the jars.
Step 6: Cool and Store
When the pressure’s back to zero, carefully open the canner and lift out the jars. Set ‘em on a towel or rack to cool for 12-24 hours. You’ll hear that sweet “pop” as the lids seal. After they’re cool, check the seals by pressin’ the center of the lid—if it don’t move, you’re golden. Store ‘em in a cool, dark place, and they’ll keep for a year or more. Any jars that didn’t seal? Pop ‘em in the fridge and eat within a week.
Tips and Tricks for Canning Success
Now that you’ve got the basics, here’s some extra nuggets of wisdom I’ve picked up over the years to make sure your canning game is on point:
- Pick Fresh Beans: The fresher your green beans, the better the end result. If you can, use beans straight from the garden or a farmer’s market. They’ll have the best flavor and texture.
- Don’t Skimp on Packin’: Seriously, pack those jars tight. If there’s too much water, the beans can get soggy and lose their punch.
- Bacon Amounts: I usually go with a pound of bacon for every 3 pounds of beans, but feel free to adjust. More bacon equals more flavor, but don’t overdo it or it might get too greasy.
- Vinegar Wipe is Key: Don’t skip wipin’ the rims with vinegar. Bacon grease on the rim can stop a lid from sealin’ proper, and that’s a waste of good food.
- Check Your Canner: If your pressure canner ain’t been used in a while, test the gauge or get it checked at a local extension office. Safety first!
Variations to Spice Things Up
Wanna mix things up a bit? Here’s some ideas to tweak your canned green beans with bacon and make ‘em your own:
- Add Some Heat: Toss in a pinch of red pepper flakes with the bacon mix for a lil’ kick. It’s a nice surprise when you open a jar months later.
- Sweet Twist: A splash of balsamic vinegar or a tiny bit of sugar can balance out the savory with a touch of sweet. Sounds weird, but it works!
- Different Meats: If bacon ain’t your thing, try ham or even sausage bits. Just cook ‘em like the bacon before packin’.
- Extra Veggies: Some folks like mixin’ in other stuff like diced carrots or potatoes. Just remember, anything low-acid needs pressure canning.
Why Canning is a Game-Changer
Let me tell ya, canning green beans with bacon ain’t just about food—it’s about buildin’ a safety net. I remember when I first started doin’ this, it was ‘cause I wanted to be ready for anything. Storms, power outages, or just a tight budget month—havin’ jars of food on the shelf means you’ve always got somethin’ to eat. And when it’s flavored with bacon? That’s not survival food; that’s livin’ good!
There’s also somethin’ special about carryin’ on a tradition. My grandma used to can everything under the sun, and eatin’ her green beans with bacon was like a hug in a jar. Now, every time I pop open one of my own, I feel connected to her. Maybe you’ve got memories like that too, or maybe you’re startin’ new ones for your family. Either way, this is a skill worth passin’ down.
What to Pair with Your Canned Green Beans
When you’re ready to crack open a jar, these green beans with bacon are a killer side dish. They go great with hearty meals like smoked ribs, roast chicken, or even just a simple sandwich. Heat ‘em up on the stove with a little extra broth if you want more of a saucy vibe. I’ve even tossed ‘em into a casserole for a quick dinner fix. The smoky flavor pairs awesome with anything grilled or roasted, so get creative!
Troubleshootin’ Common Canning Hiccups
Even with the best plans, stuff can go sideways when canning. Here’s how to handle a few common oopsies I’ve run into:
- Jars Didn’t Seal: If a lid don’t pop down, don’t panic. Just stick that jar in the fridge and eat it soon. Don’t try to re-process; it’s not worth the risk.
- Beans Look Cloudy: If the liquid in the jar looks off or cloudy after a while, toss it. Could be a sign of spoilage, and you don’t wanna mess with that.
- Too Much Liquid: If you didn’t pack tight enough, you might have watery jars. Still edible, just drain some off when you heat ‘em up.
- Bacon Fat Issues: Sometimes the bacon fat can make the seal tricky. That’s why the vinegar wipe is non-negotiable. If you notice grease buildup, double-check your technique next time.
The Joy of Homemade Goodness
I gotta say, there’s nothin’ quite like pullin’ a jar of home-canned green beans with bacon off the shelf on a cold winter night. It’s like summer in a jar, with that extra bacon punch to warm ya up. I’ve shared these with friends at potlucks, and they always ask for the secret. Well, now you know it ain’t no secret—just some good ol’ kitchen know-how and a love for flavor.
Canning might seem intimidatin’ at first, but once you get the hang of it, it’s like ridin’ a bike. Start with a small batch if you’re nervous, and before ya know it, you’ll be canning everything in sight. It’s a way to take control of your food, save some cash, and eat darn well while you’re at it.
Wrappin’ It Up: Get Canning Today!
So, there ya have it—everything you need to know about how to can green beans with bacon. From gatherin’ your gear to packin’ jars and processin’ ‘em safe, it’s all laid out for ya. This is one of those projects that pays off big time, whether you’re stockin’ up for tough days or just wantin’ a quick, tasty side for dinner.
I’d love to hear how it goes for you! Drop a comment below with your canning stories, any tweaks you made, or if you ran into snags. We’re all learnin’ together, and I’m here to help if ya got questions. Now, go grab some beans and bacon, and let’s get those jars filled. Happy canning, y’all!
How to Can Green Beans
- ▢ 1 lb cleaned green beans per quart jar approximately
- ▢ 1 tsp canning salt per quart jar
- ▢ 1 ½ cups boiling water per quart jar
- Prepare your pressure canner to the specified instructions.
- Clean and cut the beans into bite-size pieces. Fill the sterilized jars about ⅓ full and tap the bottom to the palm of your hand to ensure the beans are packed in well. This will make sure there is no dead space at the bottom of the jar once canned. Repeat for the remaining ⅔ of the jar, leaving ½-inch of headspace at the top. Add the canning salt to each jar.1 lb cleaned green beans per quart jar, 1 tsp canning salt per quart jar
- Pour boiling water over the prepared beans retaining that ½-inch of headspace.1 ½ cups boiling water per quart jar
- Place on prepared lids and rings. Tighten to finger tight.
- Pressure for 25 minutes at 10 pounds pressure, adjusting for altitude. Watch pressure throughout time and adjust heat as needed to stay at the 10 pounds of pressure.
- After 25 minutes, remove from heat and allow to cool until the pressure gauge shows zero. Note: Adjust the time for your elevation according to the USDA canning guide.
- Remove from canner and cool 12-24 hours.
- Label and store for up to one year.
Watch how to can green beans.
I hope you make this recipe and put some food on your table. Leave a comment and share a star rating so you can let others know how much you love this recipe. This helps show others that this is a recipe they, too, can make, enjoy, and love!

Bacon Green Beans – Green Bean with Bacon – Perfect Side Dish – The Hillbilly Kitchen
FAQ
Can you put bacon in green beans when canning?
Use regular, not thick-cut, bacon for the beans.
My mom says 2 slices per (15.5-ounce) can is about right.
Can I put raw bacon in green beans?
How do you can green beans the old fashioned way?

To can green beans the old-fashioned way, you can use the water bath canning method. This involves packing cleaned and trimmed green beans into sterilized jars, covering them with a boiling water solution, and then processing them in a boiling water bath for a specific amount of time.
Can you can with bacon?
My latest canning adventures have included everything from canned cheese to canned butter to canned bacon. To can bacon all you need are quart jars, 12-inch-wide masking paper, pressure canner, and bacon.